
Travel Photography
by Jerry Venz
Great photography isn’t about flooding your subject with light—it’s about sculpting with light against shadow. To that end, looking for and using directional natural light is just as important in travel photography as it is in portrait or nature photography. I want as much—maybe more—drama in my travel images than in my portraits. This is especially so when we went to Italy and I finally got to photograph the famous City of Pompeii—a city literally buried in drama!
TIP #1 – LOOK FOR THE SHADOWS! Three dimensionality in art is created by shadows. In portrait photography we make the shadows with lighting (studio) or with gobos (subtractive lighting) when outside. If you see no shadows when outside you’re either in the wrong spot or it’s the wrong time of day.
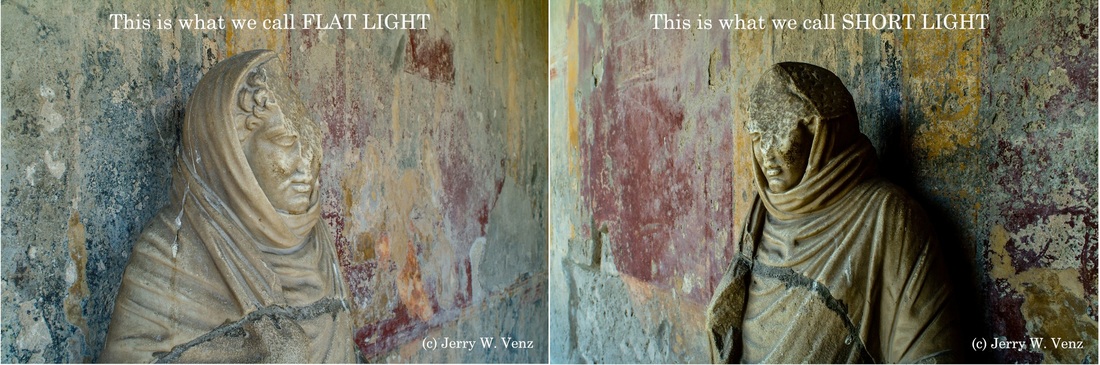
In these images, of the same subject, in Pompeii, I photographed the left image the way all the tourists did as they walked by; in the Flat Light with no three dimensionality. All I had to do was change my camera position 180° and on the other side of the statue we now have Short Lighting (one of the basic types of portrait lighting) with dimension and texture.
TIP #2 – NARROW YOUR VIEW; SHOWING LESS CAN REVEAL MORE! When doing travel or nature photography don’t just do the landscape views (horizontal big views) like so many tourist do. Use your lenses to crop the scene into compositionally pleasing pieces. I’ll often take a large horizontal subject and do vertical slices of it details or crop closer like in this example.
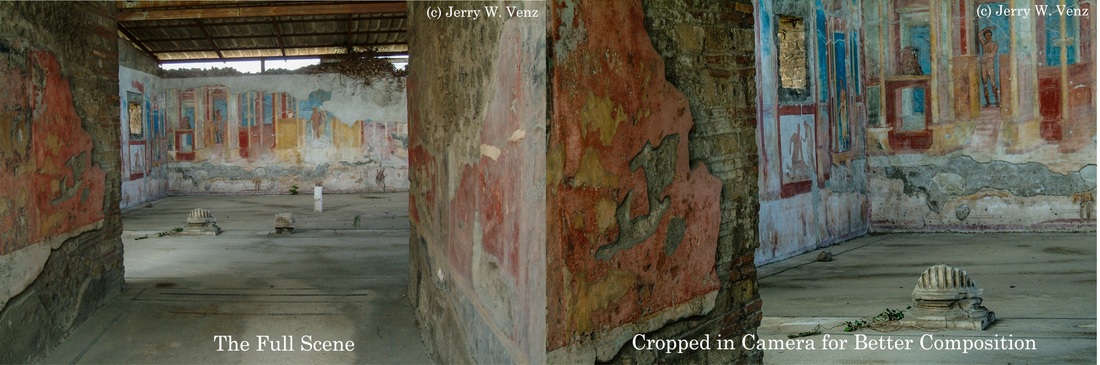
The image on the left is a “record shot” of the entrance into one of the many Pompeii rooms with frescos still on the walls. I didn’t like the square pillar in the middle or the white pipe to its right, so I moved in and panned left and zoomed to exclude the bright light at the roof line.
TIP #3 – USE THE CLASSIC COMPOSITIONAL RULES As cropped, this image works because I’ve used several classic compositional rules:
1) Add depth and interest by including:
a. Foreground (the wall on the left)
b. Mid-ground (the broken pillar on the floor)
c. Background (the frescos on the corner walls behind the pillar)
1) Use leading lines (The wall on the left is pointing into the image; leading you to the pillar.)
2) The Rule of Thirds; have centers of interest at the intersections of the thirds grid (four points); that keeps you from centering your subject!
Jerry W. Venz, PPA (Professional Photographers of America) Master Photographer, Craftsman, Certified; WPPI (Wedding Portrait Photography International): APM & AOPA; Past Fuji Talent Team Member